

Screen recording in windows 11 has become an essential tool for many tasks, from creating tutorials to capturing gameplay moments and demonstrating software functionality. With Windows 11, Microsoft has refined its screen recording capabilities, making it easier and more integrated into the operating system. If you’re new to Windows 11 and want to learn how to effectively use its screen recording features, this guide will walk you through everything you need to know.
Getting Started with Screen Recording
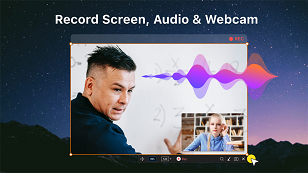
Windows 11 offers a built-in screen recording tool called “Capture.” This tool allows you to record your screen along with audio from your microphone or system sound. Here’s how you can access and use it:
- Accessing Capture Tool:
- To launch the Capture tool, press
Windows key + G. This key combination opens the Xbox Game Bar, which includes the screen recording feature. - Alternatively, you can search for “Capture settings” in the Start menu and open it from there.
- Setting Up Your Recording:
4. Once you have the Capture tool open, you’ll see options to start a new recording, take screenshots, and adjust settings.
5. Click on “Record” to start a new screen recording session.
The following shortcut Tips are ones you’ll want to keep in mind:
Windows key+G: Open Xbox Game Bar.
Windows key+Alt+R: Start or stop recording.
Windows key+ Alt+G: Record the last 30 seconds of screen activity.
Windows key+Alt+B: Turn HDR on or off.
Windows key+Alt+PrtScn: Take a static screenshot of your screen activity.
Recording Options and Settings
Windows 11 provides several options to customize your recording experience:
- Recording Modes: Choose between capturing the entire screen or just a specific window.
- Audio Sources: Select whether to record system audio, microphone input, or both.
- Quality Settings: Adjust video quality settings based on your preferences and the purpose of your recording.
Tips for Effective Screen Recording
To make the most of your screen recording sessions, consider these tips:
- Plan Your Recording: Have a clear idea of what you want to capture before you start recording.
- Use Keyboard Shortcuts: Learn the shortcuts (e.g.,
Windows key + Alt + Rto start and stop recording) to streamline your workflow. - Check Audio Levels: Ensure your microphone and system audio levels are balanced and clear before recording.
Editing and Sharing Your Recordings
After you’ve finished recording your screen in Windows 11, you can access your recordings through the Xbox Game Bar:
- Editing: While Windows 11’s built-in tool offers basic recording features, for more advanced editing, consider using third-party software like Adobe Premiere or Camtasia.
- Sharing: Easily share your recordings by navigating to the folder where they are saved (default location is Videos > Captures) and using Windows’ built-in sharing options.
Advanced Features
Windows 11’s screen recording capabilities extend beyond basic functionality:
- Xbox Game Bar Integration: Besides screen recording, the Xbox Game Bar offers features like broadcasting to Twitch and capturing screenshots.
- Game Mode: If you’re recording gameplay, enable Game Mode to optimize your PC’s performance while recording.
Troubleshooting Common Issues
If you encounter problems while recording, such as audio syncing issues or low-quality recordings, try these troubleshooting steps:
- Update Drivers: Ensure your graphics and audio drivers are up to date.
- Check Permissions: Make sure the Capture tool has permission to access your microphone and camera.
Conclusion
Screen recording in Windows 11 is a powerful feature that can enhance your productivity and creativity. Whether you’re creating tutorials, capturing gameplay, or demonstrating software, understanding how to effectively use the built-in tools can greatly improve your experience. With this guide, you should now have a solid foundation to start recording your screen with confidence in Windows 11.
By mastering screen recording, you unlock a versatile tool that not only helps you communicate ideas effectively but also enables you to share your knowledge and experiences with others seamlessly. As you become more familiar with the process, consider exploring additional features and third-party tools to further enhance your recordings and achieve your desired outcomes.